
Do you believe in magic, or the power of a can of spray paint?… Well, here’s a magic trick you can do to your old shower for under $15. Sounds like magic to me! I recently did a bathroom refresh on a tight budget and one of the things I really wanted to do was this shower. With limited funds to spend I completely transformed this space. Today I’m sharing the shower details.
It all started with a simple bathroom organizing project that turned into an entire refresh. I really wanted to update the room to give it a more soothing, spa like vibe. However, I had a very small budget. When I started planning the look, the shower seemed like such an eye sore. I was worried once I updated everything and left the shower as is I would still be disappointed. So, I decided to try spray painting it.
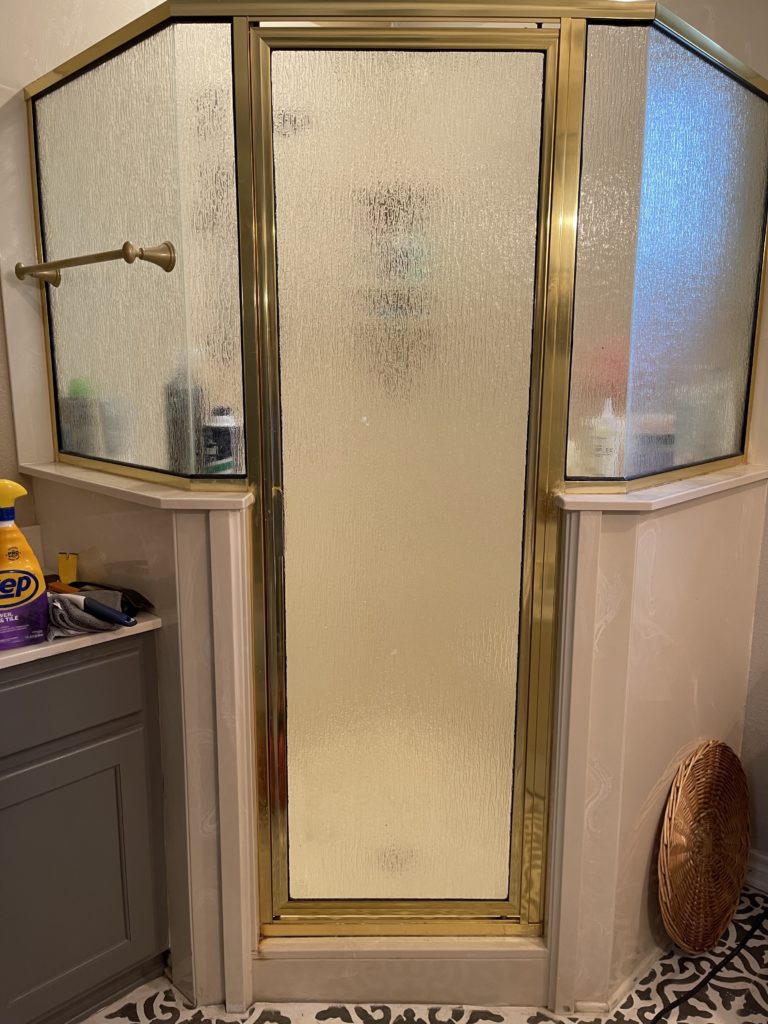
Here’s the before. Just the typical dated gold shower with no personality. I did some research and after painting our window frames last year, I felt very confident in this project.

I decided to use my favorite Rustoleum 2X spray paint with primer. I have seen others use a metal primer then apply the paint. However this method has worked for me in the past and I felt pretty confident with it.
Step 1
Prep work is the most important part of this project. First I thoroughly cleaned inside and out making sure all residue dirt was removed and fully dry.

Step 2
This is the VERY most important part, taping the entire area. First, make sure you have applied the tape securely around the entire edge of the frame. Then cover the glass and surroundings with paper. Also be sure to cover the rest of the area with plastic covering. The spray from the can will get everywhere so cover everything you can with plastic and paper. Make sure you open any windows and create plenty of ventilation. I recommend wearing a face mask as well.
I used cardboard to protect the open area at the top of the shower.

Step 3
Once it was all finished, I removed all the tape and paper. I did have some overspray in areas, but it was very easy to clean up with nail polish remover on a rag. You can wipe up the black overspray with a damp rag.

I love the look of the black panes on windows and wanted to try getting this same look. I had seen others use black electrical tape on windows and thought it would work here as well. It only cost me $3 and won’t ruin the surface so nothing to lose. I wiped the doors down well with alcohol and let it thoroughly dry. Once it was dry, I created grid lines with strips of tape making sure to press it firmly to the glass. So far it has stayed on quite well. If I start having issues with it, I may add a touch of hot glue to each end, but so far so good.

I’m so happy with how it looks and what a huge impact it made in the entire space. It really gave the most outstanding update to the old gold shower. Stay tuned to see the rest of the room updates, you won’t believe how awesome and easy they are.
Be sure to subscribe to my weekly newsletter for updates and more inspiration. Thanks for following along I hope this inspired you !


")


Unbelievably awesome!!!!
Thanks !
The bathroom and shower door are very nice. Did you paint the inside of the shower door frame?? I hope you give some updates in 3, 6, 12 months about how this is holding up!!
Hello Elle, Yes I did paint the inside and so far everything is holding up great. I will definitely give updates.
Thanks xoxo
It looks so beautiful and I love it great job.
Thanks so much!
Take luxury to a new level with this Studios. .Real fashion world.
Reading your article helped me a lot and I agree with you. But I still have some doubts, can you clarify for me? I’ll keep an eye out for your answers.