
When I started to design my vision for our home office, I knew I really wanted to incorporate some rich wood beams into the room. However, simplicity was the key. So we decided to try this DIY faux beam project and wow was it easy. The impact it made in the room is amazing and we love the look. Here’s what we did to create our wood beams….
Supplies:
- 1″ x 6″ 4 Pine Boards cut to the length to fit your ceiling dimensions
- Brad Nailer/nails
- Drill and screws
- Level
- Stud Finder
- Stain of your choice- I used Dark Walnut
Note this project is definitely a 2 person project as far as install is concerned.
Step 1
First you will need to create a “box” with 3 boards to create the actual beam. Attach 2 sides to the bottom with your brad nailer making sure everything is lined up and level.


Step 2
Once the beams are complete, stain them and let dry. This way you won’t have to mess with it once they are on the ceiling.

Step 3
Mark the studs in your ceiling once you decide which direction to hang your beams.

Step 4
Attach your base ceiling board into the ceiling where you’ve marked the studs. We used wood screws for better attachment. Use a level to be sure your boards are straight.

Step 5
Once your base board is secure, you can add your beam. This will definitely take 2 people as the beam will be heavy. Lift up the beam and hold against your base board. Then use your brad nailer to attach the beam on the sides to the stable base board.


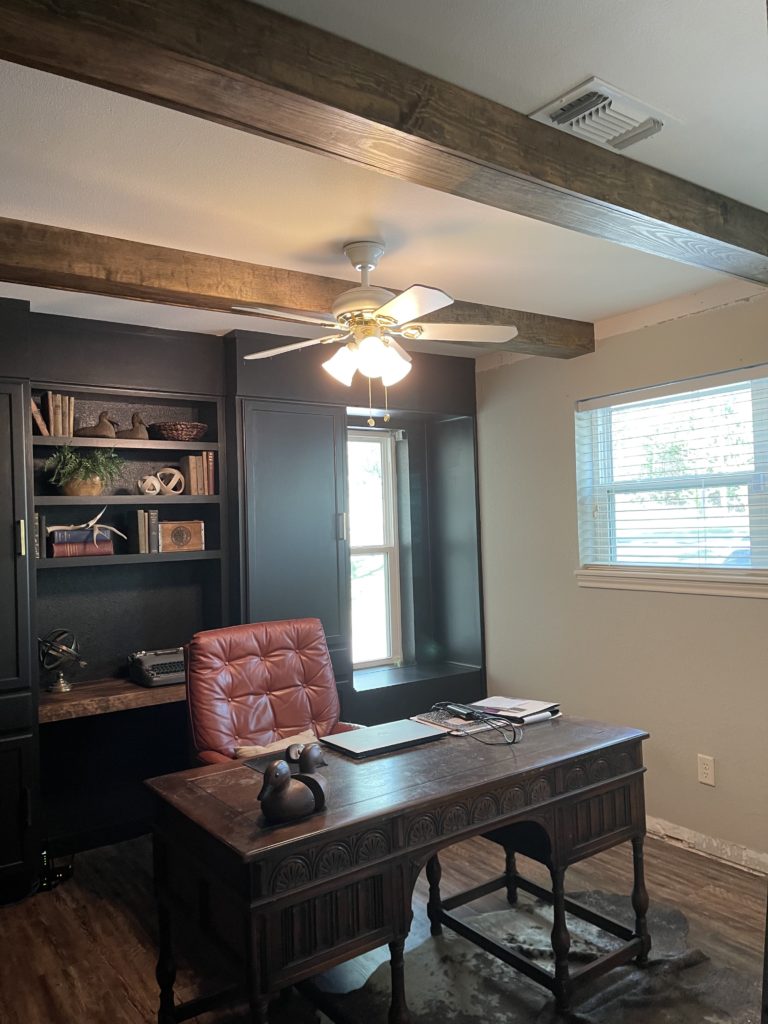
That’s all there is to it. Very simple and wow what a difference it makes. I love the rich character it adds to the room. For reference our ceilings are 8′ high. We do not feel that they look too low or enclose the room in anyway. You can definitely make them smaller and lessen the depth if that’s a concern for you.


This update of our home office was a huge project but we are so happy with how it all turned out. It’s such a beautiful space and has so much character and texture. For details on how we created everything in the room you can visit these 2 posts Beautiful DIY Office Update Part 1, Beautiful Home Office Update Part 2
Also, the faux brick wall was super easy and I have the details here How To Create A Rustic Faux Brick Wall

Now I’m trying to decide which room to add more beams to . It was so simple and I love what an upgrade it gave the room. I love a simple and inexpensive DIY, how about you? Be sure you’re subscribed to my weekly newsletter so you won’t miss out on a post and what’s new around here.
Happy Decorating
DIY Faux Beam Project


")


Greetings! Very useful advice in this particular article! It’s the little changes that produce the most important changes. Thanks for sharing!
Hi, I do think this is an excellent blog. I stumbledupon it 😉 I may come back yet again since i have saved as a favorite it. Money and freedom is the greatest way to change, may you be rich and continue to guide others.
maria bingo free spins