
Welcome to part 2 of our DIY home office updates. This is the largest full room DIY project we’ve ever taken on. It was a challenge but we are so happy with the results. To read about the first part to this room makeover you can go here Beautiful DIY Office Update Part 1. In that post I share how we created the built ins with no carpentry experience and the steps we took to create the entire look. In this post I’m sharing the details that we added to create the final wow factor.
First let’s take a look back at the before. We really weren’t taking advantage of the space and had too much going on in this small room. We wanted to create a crisp, modern industrial vibe and make it functional as well. There are many vintage items passed down from family we wanted to include including this gorgeous old desk.

I started with a mood board to create a vibe and feel fo the look we were going for.

We started with the hardest part by building the cabinet built ins and then added on the special details next. I love this rich dark paint color and the moody vibe it creates. We used the color Greenblack by Sherwin Williams in a satin finish.

Faux Wood Beams
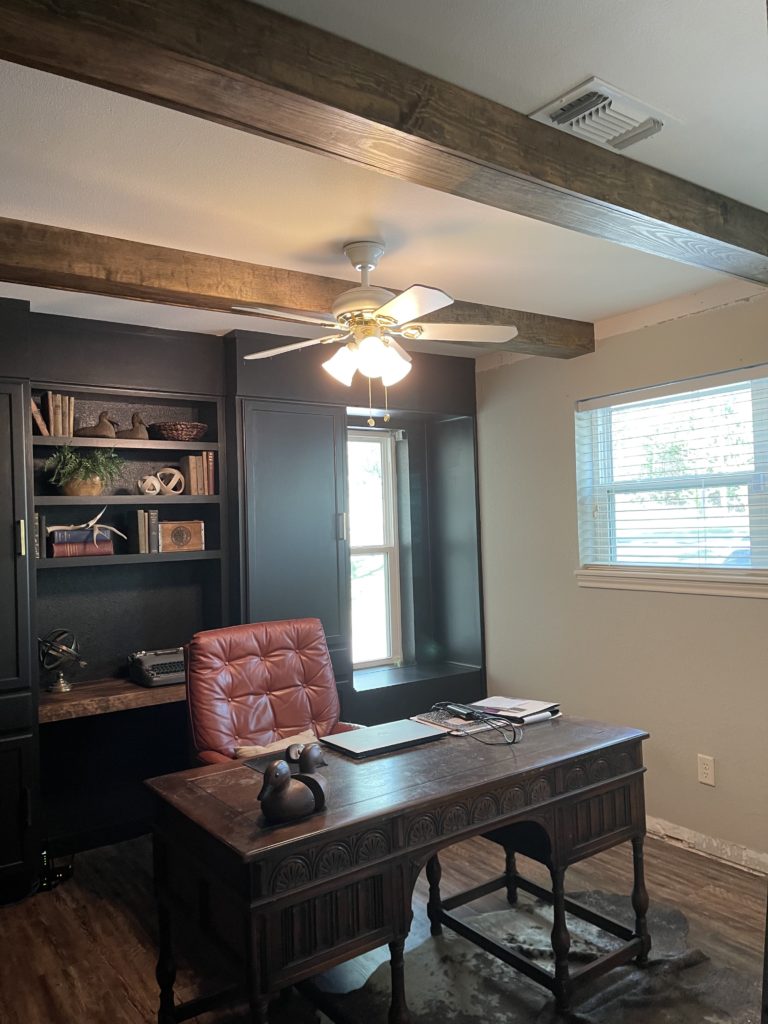
The next step was to add some rich wood accents by installing faux wood beams. To give that rich rustic vibe I wanted to incorporate wood beams into the room. However, they can be difficult to find and very expensive. So, we created a faux look that delivered an amazing outcome.

We started by adding a base board to the ceiling making it sturdy by attaching to the studs first.

Then we built a box with 3 boards that attached to the board in the ceiling.

I love the rich texture they added to the whole room….now to get rid of that awful ceiling fan! Don’t worry it’s now long gone!
Faux Brick
The final detail we added to the space is a faux brick wall. I wanted to incorporate this wall to give some industrial looking texture in the space. These faux brick panels are so easy to work with. I love that they have the real texture of brick.

Once we had all the panels attached it was time to give it an “exposed” vibe. I wanted some white to brighten up around the window to help make it feel airy in spite of the dark built ins.

I used a joint compound and smeared it directly onto the brick in strokes just like icing a cake. This lightweight compound is very easy to work with and you can add it as heavily as you want. I definitely wanted to see the brick showing through as if plaster had worn off the red brick.


The final addition to the space are the fun gold sconces . Instead of hard wiring them, we mounted them with no wiring and inserted batter operated remote control light bulbs. Its a simple solution to add the ambiance of lighting without having to hard wire .

We are so thrilled with how this entire project turned out. It was hard work and challenging but we are so proud of the results. With some research and perseverance you really can tackle difficult projects if you put your mind to it. Don’t let a scary looking project scare you away or intimidate you. Just do some research and look for rooms that inspire you. Once you have that goal, achieving it won’t be so hard. If we can do it, anyone can.
Watch for more detailed posts ahead on how to create the faux beams and faux brick wall coming soon. Be sure to subscribe to my weekly newsletter so you won’t miss out on the latest updates and newest blog posts.
Happy Decorating
HOME OFFICE UPDATES


")


Nice blog about home office updates, I think your blog very helpful for lot of people, thanks for sharing the information.
Excellent Article!
I was looking for home office tips.