
Welcome….that’s what this beauty says to anyone who comes to visit! isn’t she a beauty? I love how this project turned out and it was surprisingly easy. Well, it was super easy for me because I mostly stood around and gave design advice and took pictures. Mr. H& H did all the hard work and it was his idea so all the credit goes to him. What a pretty welcoming it gives our home and it looks awesome at night all lit up. Come see how we made this DIY address planter sign.
I have always wanted a fun sign out front to greet our guests and show our address number. I mentioned it to my hubby some time ago and he came up with this project all on his own. I’m so wowed and impressed and hope you will be too.
Supplies:
- 2 4×4 pine posts
- Post cap and finial if desired
- 1×6 pine board
- 2×4 board
- Pre made planter box or make one-We purchased a pre made box from Lowes
- 3 1x4x8 pine boards(sign)
- 1 1x2x6 (sign trim)
- Wood or metal numbers-I purchased our wood numbers from Hobby Lobby
- Chain and eye hooks
- Quickrete (1 sack)
- Level
- Wood Screws
- Solar light of your choice. We purchased ours from our local Tractor Supply
- Paint or stain of your choice. We painted ours with Iron Ore from Sherwin Williams

Step 1
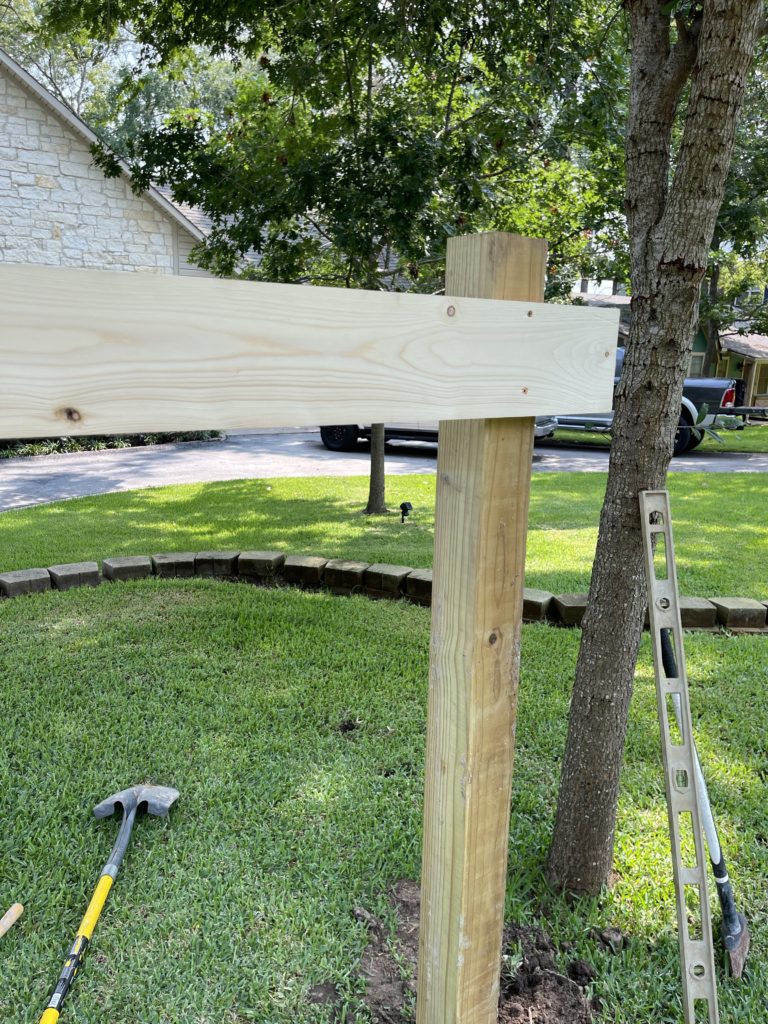
Determine the width you want your sign. Ours was 59″ H by 33″ wide. Then dig the holes for your posts about 12″ deep .


Once you have the holes dug, be sure you have the posts level by placing a board on top with a level. Next, mix up your concrete and pour into holes making sure the posts are level top to bottom and across.


Step 2
Whole posts are drying you can add your 1×6 cross board. this will help keep the posts sturdy and level as they are drying.


Next add your post toppers and finials if desired. We screwed in the base first then added the finial on top after drilling holes into the top post.

Step 3
First add your 2×4 cross board at the bottom after you determine where you want your planter box located. Be sure to leave room for the hanging sign and remember there will be some height to the plants you add to fill in space. It it’s too high the plants could block our sign. Once your board is attached, add the planter box. We decided to just go with a pre made box from Lowes. This helped cut a few corners and took some time off the construction of the sign.

Here’s how the sign looks from behind.

I had already purchased the plants I wanted to use so it was helpful to place them in the box when determining where to hang the planter.

Step 4
This is when it started getting super cute. Add the light and bam it comes to life. I love the cute crock neck on this style but there are many solar light options to fit any style.


Step 5
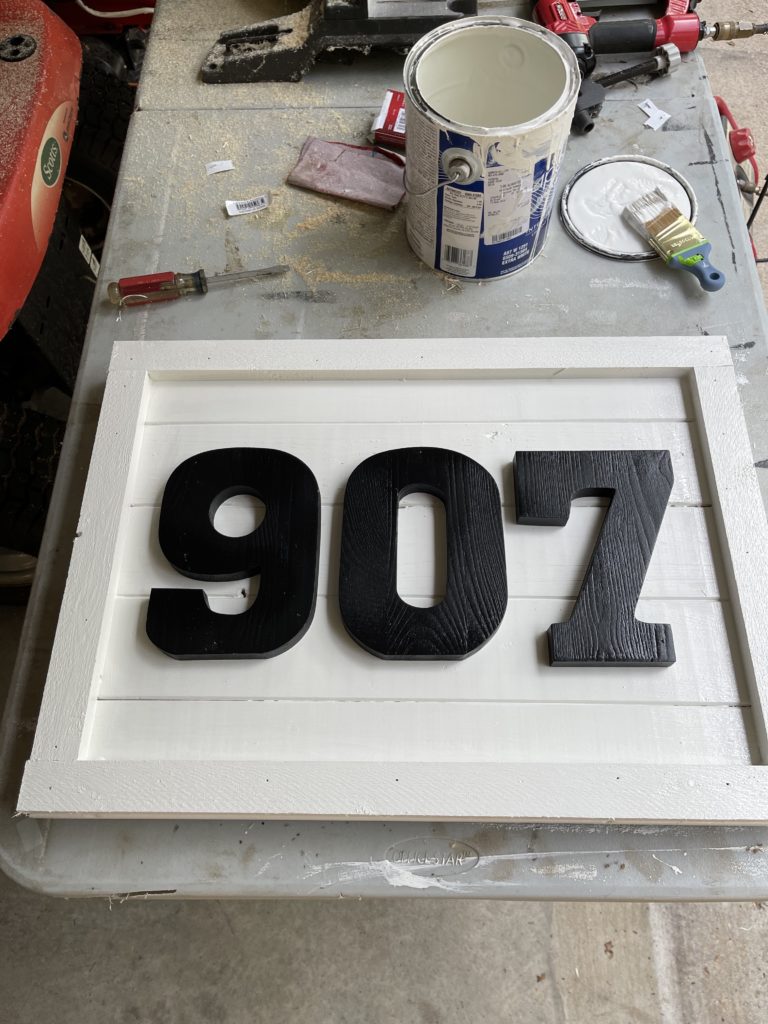
This sign was so quick and easy to do that I forgot to stop and take pictures of how to make it all. Basically we lined up 4 boards and used the 1×2 boards to secure them all together in the back. Then, we trimmed it out all the way around. Next we used a brad nailer to attach the numbers. First I spray painted the numbers. Once the sign was dry we added the numbers with a brad nailer.
Then we added eye hooks to the top of the sign and added chain into the the cross bar of the stand. It was simple to hang and easy to adjust if needed.
Step 6
Paint or stain your sign post . We used an outdoor latex paint by Sherwin Williams in the color Iron Ore.

I absolutely love how it turned out and the pretty greeting it gives our guests. It looks so pretty at night all lit up.

I cannot wait to decorate this for the seasons. Think cornstalks, pumpkins and Christmas greenery.

I have several posts on outdoor decor and ideas on how to jazz up spaces here How To Style A Small Outdoor Space and here Simple Outdoor Decor DIY Projects
Be sure to subscribe to my weekly newsletter so you don’t miss out on the latest posts and all thats new around here.
Happy Decorating
DIY ADDRESS PLANTER SIGN


")


I ran across your site and loved your planter sign. I live in a small condo neighborhood and I want to spruce up our entry – this would be perfect. Can you tell me the cost to build? I have a board that would have to approve this. Before I gather cost I thought I would inquiry with you first. Thank you – This is a great idea
It’s really hard to say based on the type of wood you use and the numbers you select. We used all scrap wood so it was under $20 just for the 3 numbers.
thanks
What size our the numbers if you don’t mind me asking?
This is a topic that’s close to my heart… Take care! Where are your contact details though?
Very nice post. I just stumbled upon your blog and wanted to say that I’ve really enjoyed browsing your blog posts. In any case I’ll be subscribing to your feed and I hope you write again soon!
n1casin