
Who doesn’t love a simple, inexpensive DIY. I mean there is nothing more satisfying to me than doing a project that can make such a big difference with minimal work. This table was one of those projects for me and I couldn’t be happier with the results.
We have had this old table for so long and I’ve wanted to update it because replacing the whole thing is not in the budget or practical at this time. I’ve done several stencil projects on tile and linoleum in the past so I thought why not try the table tiles…and y’all it was so easy.

Below is what it looked like before. The tile is in good condition it’s just not may favorite color and is kind of boring.

Here are the supplies you need for this project:
- primer ( I used Kilz brand)
- chalk paint -1 color for the base ( I used the Waverly brand in the color Plaster)
- chalk paint- 1 color for the pattern ( I used the Waverly brand in the color INK)
- small foam paint roller with an extra foam pad or 2
- small paint tray
- painters tape
- polycrylic (I used minwax in a matte finish)
The first thing I did was remove the tiles and bring them into the garage and place on a table for work space. I primed the tiles first with one coat of Kilz brand primer and let it completely dry.

Next, I painted the tiles with 2 coats of the Plaster chalk paint letting them dry between coats.

Once your base coat is dry, it’s time for the stencil. I placed a piece of tape on each side and taped it down securely then load your roller with the paint but unload a little of it on a board or cardboard.If your roller is too heavily loaded, it could cause your paint to bleed underneath the stencil.

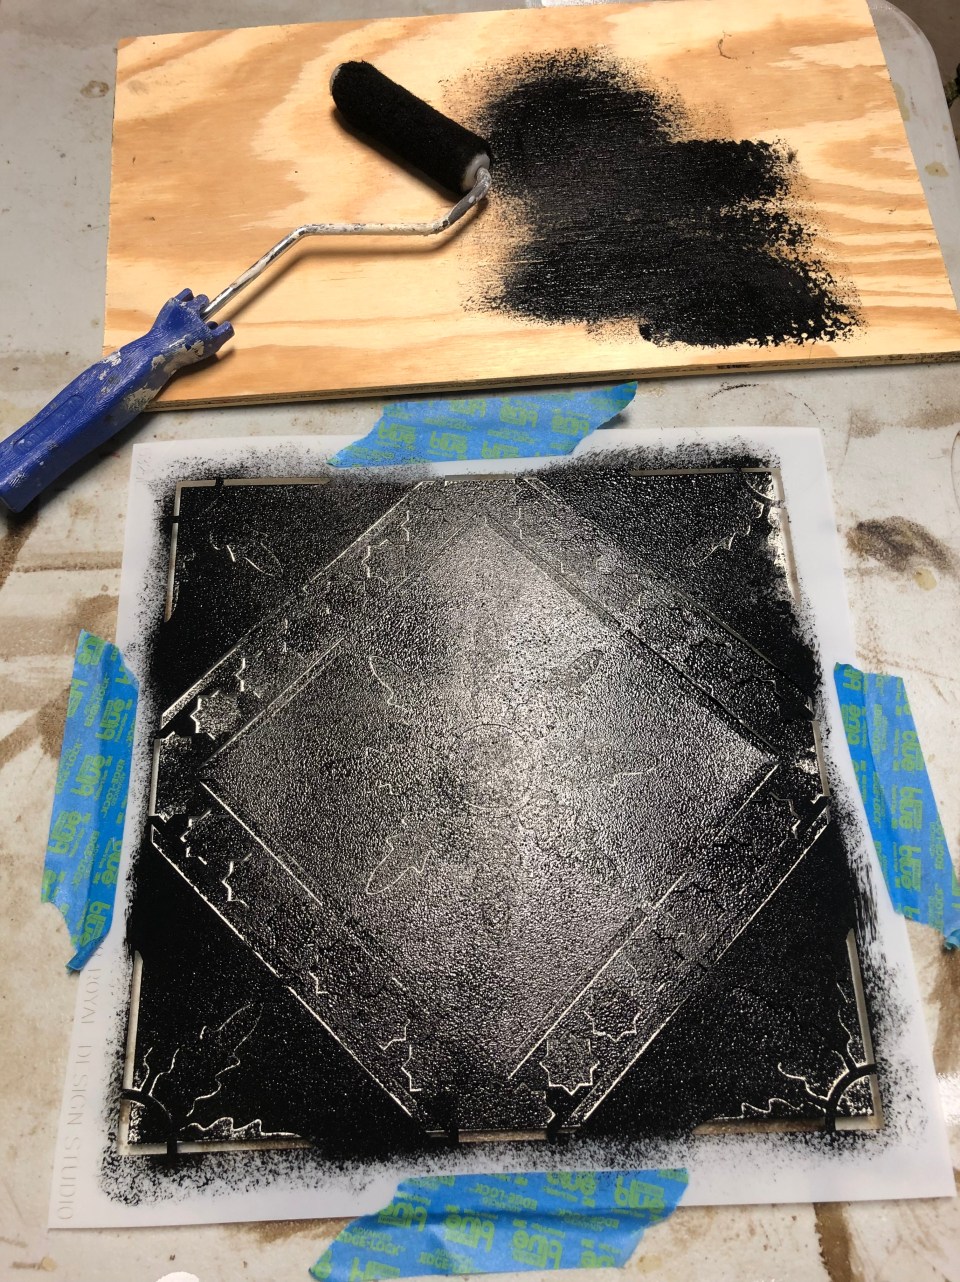
Be sure to use a firm, even press and directly on top of the stencil as you roll. Be careful not to angle it to where the brush slides or it will get paint underneath the stencil or slip. Remember this is “stenciling” so the color usually doesn’t go on perfectly even on the entire pattern like a regular paint job. It give a little more aged imperfect look. So if that bother’s you, it may not be the project look for you.
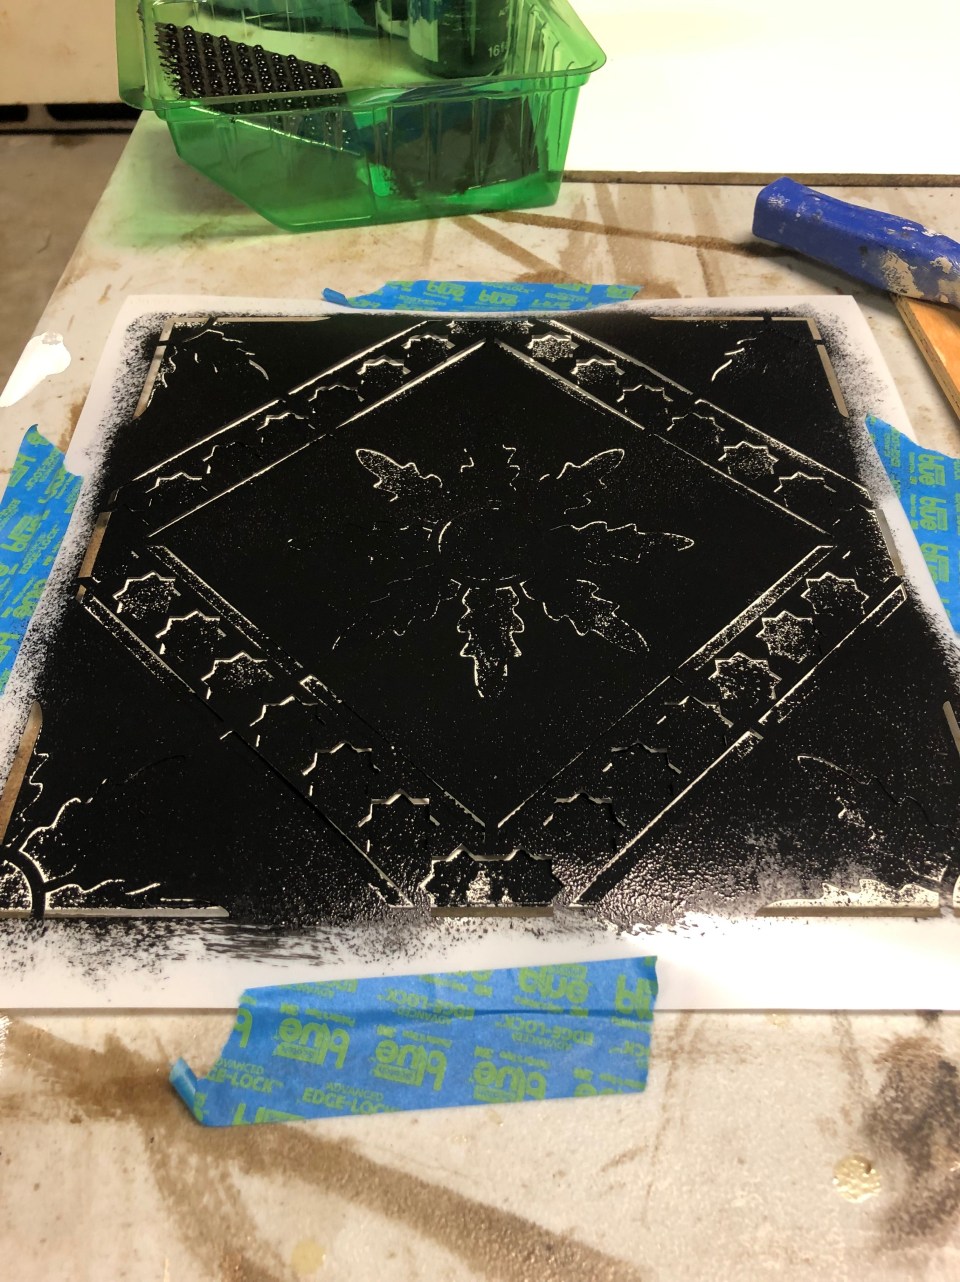
Once you’ve filled in the stencil pattern, carefully peel the stencil up off the tile. You will eventually end up with some paint on the backside of the stencil so be sure to dry the back with a fan or hair dryer each time before you lay it down. You can also purchase two stencils to alternate giving one time to dry and use the other. I did try wiping it the first time but it creates a worse mess in the long run.


Once all of your tiles are completely dry you can add the finishing touch to protect your tiles, but they need to be completely dry. Also, you want to be sure and use a foam roller and not a brush and roll the first coat very lightly barely covering it and let it dry. Then you next 2 coats and be heavier. If you go too heavy and brush too hard, you could smear your project (done that before!) so word of warning on this step.
I ended up doing 3 coats and it held up great in our first heavy rainstorm. I recommend adding a new coat overy year depending on your weather and climate.

I’m just so happy with the character it added to the table and fave it new life. It seriously looks like a whole new table (for under $50!)

So friends, what do you think? SOmetimes just a little out of the box thinking is all you need to refresh a space, piece of furniture or any decor for that matter. It really doesn’t have to be expensive to look fabulous. Your feedback is always appreciated. I’d love your thoughts and of course will be happy to answer any of your questions. Thanks for following along. and have a wonderful summer!


")


Love it, it looks awesome. I want to try it. Where did you get the stencil?
Hi Angie,
Thank you, I purchased it from http://www.royaldesignstudio.com and the pattern is called Moroc Floral.
Hope that helps and thanks for visiting!
Deborah I have the same table some my tile broke do you know what size the tile are because a. 12by 12 is a tap to big
Hi Brenda,
I’m pretty sure our tiles are 12″ x 12″.
Sorry that doesn’t help much… thanks for following
Deborah
I have this exact table. We took it down to our beach house because it looked so bad! Bet I’ll be bringing it back home once I get ahold of it with your beautiful idea! I absolutely love it!!
Hi Jan,
Yay, glad you were inspired. It brought it back to life.
~Deborah
Looks awesome, what a great facelift for low price!! I might just have to try that myself..love it as always❤️
Hi Pammie,
Thank you so much for the feedback. I’m glad it inspired you.
Thanks for following along.
~Deborah
Wow table looks great! Did you put a sealer over the top?
Hi Betsy,
Thank you! Yes I applied a polycrylic top coat in a few coats.
Thanks for following,
Deborah
Tha k you so much for posting with directions. I followed them exactly and my table turned out great. I only did a few tiles and alternated. Love how it turned out.
Kari recently posted…Beautiful Homemade Gift Ideas
Hi Kari,
Oh I love that idea with alternating.Thanks for sharing that I’m so glad it worked out.
Appreciate the feedback
Deborah
Hi! How was your project held up? I have the EXACT same table and followed all the steps you took, just need to seal it! What sealer did you use? Do you cover your table when you’re not using it to protect it from the sun?
Thanks for this blog! It was SO inspiring!
Hi Melanie,
It held up ok but some spots peeled. I’m pretty sure they are in the areas that may have not been prepared as well and we did not cover ours in the bad weather. I would definitely recommend covering it in bad weather and sealing it with a polycrylic with a few coats and then repeat each year. You might even research an outdoor sealer.
Hope that helps a bit
Deborah
Also, where did you find cushions to fit your chairs? I have the same chairs and I can never find cushions that fit right! Many trips back to the store to do a return have been done!
Hi Melanie,
I got the cushions from a store called AT Home (formerly Garden RIdge) not sure if they have those where you live but they have a huge selection.
Hope this helps
Deborah
Hi! Do you have to use chalk paint for this project or could I use a different kind of paint?
Thanks!!
Hi Caroilne,
No in fact I would suggest using an outdoor paint or an outdoor seal on top.
Thanks
~Deborah
How big are the tiles? Can I purchase new tiles from a box store instead?
Hi Faline,
They are 12x 12 but that depends on the size your table needs. Yes you can purchase new tiles if you want to.
Thanks
Deborah
Where did you find the stencil? I love this and want to transform my table.
Hi Alicia,
I got the stencil from Royal Stencils https://www.royaldesignstudio.com
They have a huge selection to choose from
Thanks!
Deborah
Wow,These blog is very nice and informative. Thank you for sharing this information it helps me a lot. I really love reading your article very nice and very interesting.
dome products
I really love reading your article very nice and very interesting. And it was very informative.
Read More
This table and chairs looks fantastic! Prettier than anything you could have purchased! Great job! I’m so inspired!
Hi Kay,
Thanks, I appreciate your kind feedback.
~Deborah
Thanks for sharing this project. I’m so excited to revitalize my tiled patio table this summer. What too coat/sealer/polyurethane did you use to insure that it held up rain or shine?
Oh yay!
I used a water based sealer. Be sure not to use an oil based polyurethane because it can yellow your paint colors.
I loved the finished product! Sadly though the first rainy day we had here in Michigan- rained all day- all of the tiles bubbled. Super sad. Not sure if I should try outdoor spray paint. I love the idea! Please send thoughts!
Hi Katie ,
Sorry that happened total bummer. Yes maybe try an outdoor spray paint as another option, it would probably hold up better for. our weather.. I din’t have bubbling but mine wasn’t in direct sun and we kept it partially covered.
Best of luck with it and thanks for following along.
Deborah
Hi Katie and Deborah,
I used water-based spar urethane as me top coat. I put the tiles out a day or so after and it rained….and it bubbled up. HOWEVER, I brought the tiles back in and the bubbles went away once dried. My brother in law though that the tiles just needed to cure a lot longer. I waited a week and out them back out…..no problems with bubbling since. Hope that helps.
Thanks for the feedback good information to know.
I have read your article carefully and I agree with you very much. This has provided a great help for my thesis writing, and I will seriously improve it. However, I don’t know much about a certain place. Can you help me?
Hey, you used to write magnificent, but the last several posts have been kinda boring… I miss your tremendous writings. Past few posts are just a little bit out of track! come on!
I have to express my thanks to you just for rescuing me from this incident. After surfing around throughout the search engines and obtaining suggestions which were not helpful, I figured my entire life was done. Living without the presence of approaches to the issues you’ve sorted out through this report is a critical case, as well as the kind that might have negatively affected my entire career if I had not come across your blog post. Your actual expertise and kindness in touching almost everything was precious. I don’t know what I would have done if I hadn’t encountered such a subject like this. It’s possible to at this point look forward to my future. Thanks so much for your professional and sensible help. I will not be reluctant to propose the website to any individual who needs to have assistance on this subject.