Hi friends, are you ready for summer yet? Haha i know we are all probably ready to get out of the house and get back to a new normal, I know I am. This week I’m busy sharing all kinds of fun nature related DIY projects in honor of Earth Day on April 22nd. One of the big trends this year in home decor is adding artisan accessories to your home. Beautiful pottery is one of the easiest ways, however they can be very expensive. I’ve already share 2 ways you can create some beautiful pottery by repurposeing old pots. This one is a more vintage look How To Create Vintage Inspired Pots & Make A Simple Topiary and this most recent one is super duper easy How To Turn An Old Pot Into An Artisian Stone Look . In this post, I’m sharing a more authentic looking pottery style from an old glass vase.
Here are the supplies you’ll need for this project:
- any style pot or vase. Glass works ok but a more pourus type like terra cotta may be easier
- plaster of Paris
- old container to mix the plaster of Paris in
- plastic spoon
- water
- paint colors of your choice- I used a taupe, terra cotta shade, cream, black and mossy green color
- paintbrushes
- papertowels

First put about 1/2 a cup of the plaster of Paris in your container and add a small amount of water. You want to work in small batches because it dries quickly and you don’t want to waste the product. I you want the mixture to be about the consistency of toothpaste.


Once your plaster is mixed, it’s time to start applying it to the vase. I found the easiest way is to scoop it up with your fingers and place small amounts on in a patting motion first then smoothing with your fingers. It is also helpful to have a bowl of water to dip your fingers in to keep them from getting dried plaster on them.
![]()
Continue covering the vase with the plaster intil it is completely covered. Once the sides are covered, make a thicker batch to apply on the rim. For me this was the most difficult part and the key is to get the consistency just right. You might have to play wth it a little. Also, I used a very wet amount to go back over and smooth the pot a little.
The ideas is to not have it perfectly smooth but to give it the characterisc of artisan pottery. All the little divets and cracks will give it the perfect texture and background for painting. It won’t take long for your pot to dry

Once your pot is dry, start mixing your base paint color. I softened a taupe color with a little creme panint and I watered it down. Start applying the paint with a brush in small segments wipeing off with a wet paper towel as desired. The wet paper towel will help you to lighten the color or remove it if you apply too heavily.
Then take your moss green and start adding it in the creves as if it were growing in areas of the pot. You can mix the tones lightenin or darkening with your other colors- maybe add a touch of blacck or lighten with a little creme or white.

![]()

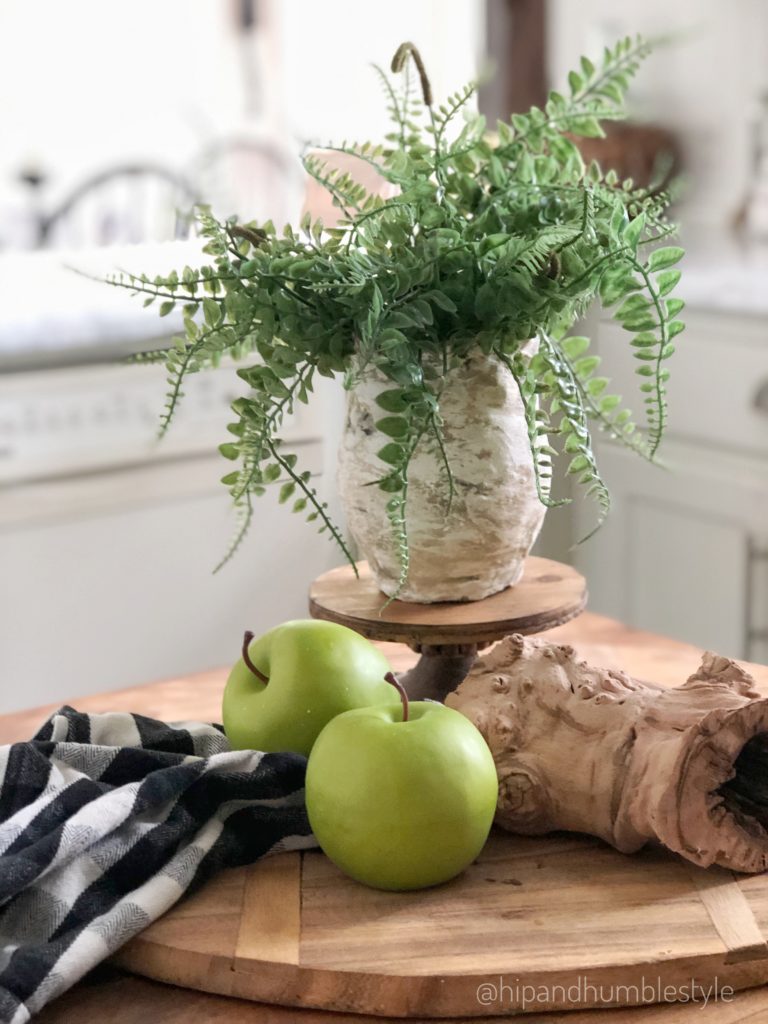
The base paint shouldn’t be even it should look worn off in some areas. Then I added some touchs of terra cotta color and small bits of black to give a little more dimension. You can see all the colors in this close up shot.

I love how they turned out and would preer to make one much larger next time. If you are unsure, start with a smaller vase to practice then do another in a larger size ( that’s what I’m going to do)

So what do you think, aren’t they fun. It really is a simple project if you don’t worry about getting it so perfect. The wet papertowels will help you a lot if you mess up your color so don’t worry about that. The good news is our really can’t mess it up. These are artisan like pieces so no one pot should look the same.
I hope you enjoyed this project and be sure to send me pictures if you make one yourself. Id love to hear your feedback and be sure to ask any questions. If you haven’t subscribed yet, be sure to so you won’t miss any posts. I have several fun projects going on this week you will love. All of them would make great gift ideas for Mother’s Day, teachers or healthcare workers.
Happy Crafting


")


Love it! How creative. Thx for sharing.
Could this method be used on a brick fireplace!
Hi Janet,
I’m not sure the effect you are attempting for a fireplace but I’ve never done this on brick before. You may want to research it a little.
Thanks
I love the colors you used thanks for sharing
Thanks for the kind feedback!
I love this look and will be trying the technique soon. I was an art student and know how quickly you need to work with plaster of Paris. I’ve been wanting an urn planter with an aged finish. These instructions might give me what I’ve been yearning for! Thanks so much for sharing.
Hi I’m glad you liked the project idea.
appreciate the feedback
This is a GREAT idea – I plan to purchase supplies tomorrow! Thanks for sharing
Oh yay, so glad to hear that. Thanks for following along…
xoxo Deborah
Beautiful look !
Thank you xoxo
This is gorgeous! Do you know if this would work for outside pots? Thanks
Hi Angela,
Thanks for following along. I wouldn’t recommend it for outdoor pots that aren’t covered. I’m not sure how they’d hold up to the elements.
~Deborah
Love this! I know what I’m doing tomorrow!
Yay so glad it inspired you! have fun…
Great repurpose for dollar store vases or the thrift store. Always tons of vases there.
Hi Kelly,
Thanks thats definitely a great way to repurpose.
xoxo
I loved your tutorial, I think I need to learn more tips, if you include them they would help me a lot. I used your tutorial to put plaster on a glass jar, but in certain places the plaster came off, how do I solve it? Thanks for sharing your projects.
Gosh sorry to hear that. I didn’t have that problem sorry. Maybe a glass primer could help?
I was just looking for this information for a while. After six hours of continuous Googleing, finally I got it in your site. I wonder what is the lack of Google strategy that don’t rank this type of informative websites in top of the list. Generally the top websites are full of garbage.