
Kitchens are in my opinion the most important room in the house. Most of the household “workings” take place in there and its the hub of the family. It’s always the place, no matter how fabulous the rest of the house is, that everyone gathers at a party. So why not make it functional and pretty? It is also one of the spaces in your home that will add value if updated. BUT what if you don’t have a budget to get your dream kitchen, total bummer right?! Well, not necessarily….
Weve been in our lake home for about a year and a half now and we’ve come a really long way, I mean LONG! It’s definitely been a fixer upper and will continue to be for some time I’m sure. you can visit this post to see some early before and after( although it’s changed already so much from that post) From frumpy to fabulous & still a work in progress…..However, with a limited budget we have tried to do most of the work ourselves and used various “hacks” to add character to things we don’t like until we can afford or decide on what we want to replace with.
So here is what the kitchen looked like before

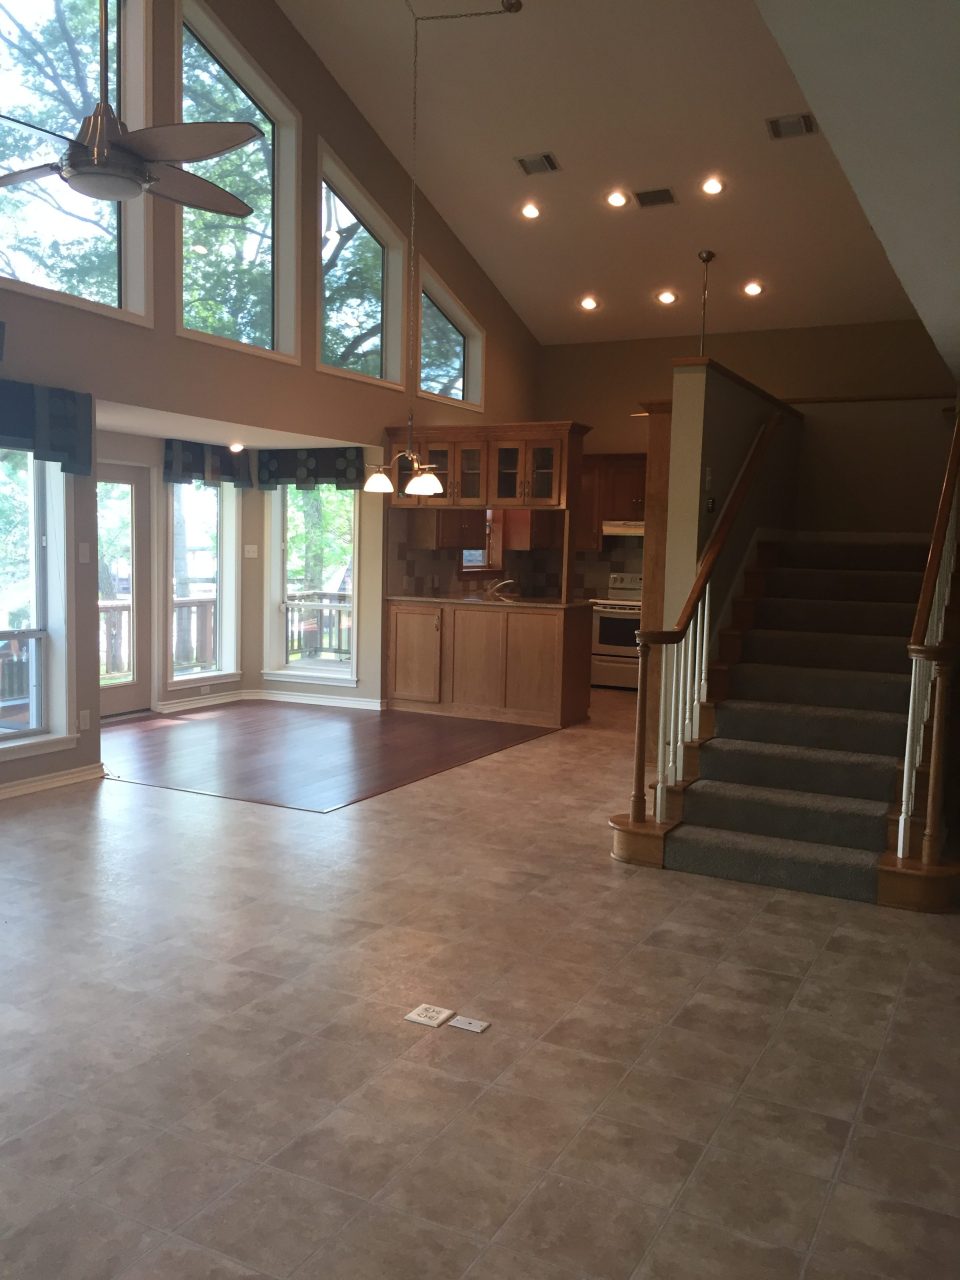
Very dated & dark for our tastes.
So, where do you start?
- First of all, decide on a realistic budget.
- Next, select the items you want to change and assign them by priority. This can be based on cost, accessibility, weather etc.
- Then, decide if any of the items/areas you are wanting improve are things you could do yourself or if you will need the help of a contractor (which will increase your price) Every project we decided to do was a DIY item that we either figured out on our own or googled for tips and ideas.
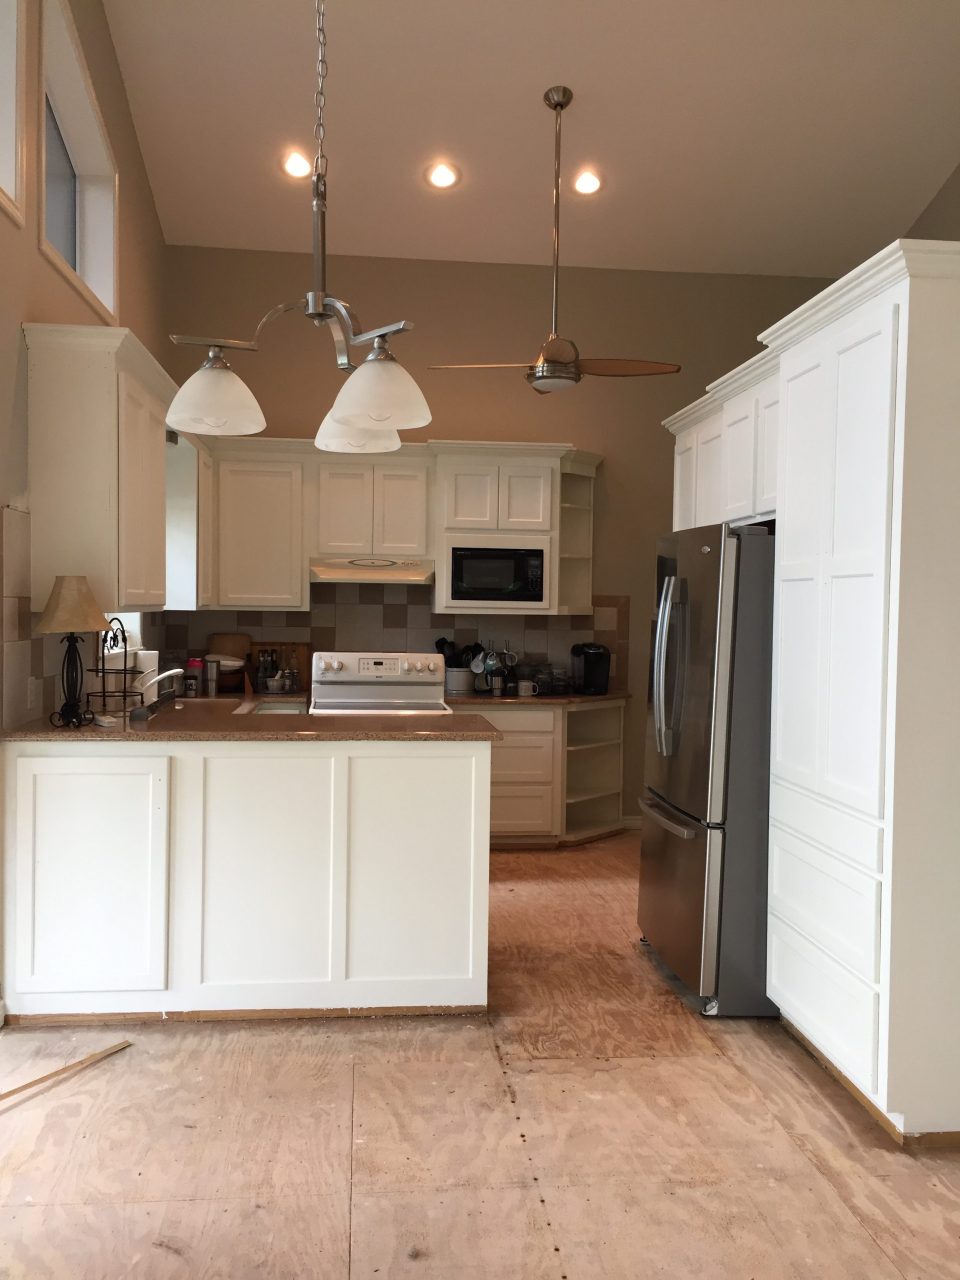
Our project has been a slow process in stages. First, before we moved in, we removed that floating cabinet to open up the kitchen area. Then we painted all the cabinets, replaced the flooring and added new hardware to the cabinets.

Our next change was to the back splash. We really didn’t have any money to do what I wanted along with all the other items on the list, so we decided to placed bead board right on top of the existing tile. Virtually no mess and super easy. You can visit the step by step in this post Update your kitchen back splash tile with bead board


We are so thrilled with how it turned out and it was all done under $100!

Next up was updating the vent hood. There was nothing wrong with it as far as function, but it was just not attractive. You can go to this post to see the details of how we built it here How To Build A Vent Hood Over An Existing Cabinet


We built this vent hood in less than half a day and it was under $50.
Next to back splash, counter tops can be the most expensive update to a kitchen depending on what you select. This is definitely not in the cards for us at this point. And honestly, the granite isn’t awful, just not working for the look I’m wanting in this space. So for a temporary fix, I covered them with marble contact paper! I had done this in a weekend home we used to own and it worked like a dream.
Now, this is definitely a temporary fix because I’m not sure they would be good for any long-term use. And you have to be cautious about what you put on them, but it’s also super easy to replace and very cheap!


I love the look of open shelving, but there is just no space to put any. And with limited cabinet space, I can’t afford to tear any out. So the solution was to take the doors off one of the cabinets, dress it up a bit and use that as the same concept. I added these peel and stick “tiles” to the back to give a little pop and some interest. I love how the white dishes look against the black pattern. This change gives so much personality to the kitchen and the best thing is if I tire of it, the doors can go right back on.


Then finally we updated the faucet with a pretty black industrial one and the “boob” light above the sink with a coordinating industrial fixture to give it a little farmhouse french feel. One day I would love to replace the sink for an apron farmhouse and also the stove. But for now, these updates have made quite a refreshing difference for so little cost I couldn’t be happier.

It is possible to create “look-alike” hacks to spaces that you may not be able to change with the real version, but that doesn’t mean its hopeless! If you do your research, there are so many possibilities & options for doing simple and inexpensive updates.
I really hope this gave you some inspiration and encouragement to go for it and give your own kitchen some love if you’ve been wanting to but just can’t financially. If you have any questions, please contact me. Also, don’t forget to visit the posts I’ve referenced to see steps of how we completed many of these projects.
As always, please contact me with any questions. I love feedback and comments so hope to hear from you soon friends!
Happy Decorating!


")


Love your style and thank you for showing how to do it all within a budget! What type and color of paint did you use to paint your kitchen cabinets?
Hi Rhonda!
Thank you so much, I really appreciate your kind comments! We used Benjamin Moore Simply white in satin. I can’t remember which type paint it is called but it has a levening agent in it to help it apply more smoothly. Hope that answers your questions?
Thanks for following along and I hope you’ll come back often!
~Deborah
Thank you!
This is a beautiful makeover! I have a similar setup in my kitchen. Where did you put your microwave? Mine is on my counter and it takes up a LOT of space.
Hi Angie,
Thank you so much. We actually put the microwave in our pantry. (I have a post on my pantry organization) I don’t have much counter space at all for that, but it was too high for it to be functional for me (I’m only 5’3″ )
Thanks for following and I hope you’ll visit often!!
~Deborah xoxo
Hi Deborah,
How are you? What a stunning transformation to your kitchen. It’s just beautiful! Great tips for saving money on renovations too. I’m so glad to have followed you on Instagram. I love your posts there. Keep up the great work! Have a great day!
Sincerely,
Heather
heatherdh72 on Instagram
Hi Heather,
Thank you so much and I’m so glad to hear you enjoyed the kitchen transformation post & I love that you are following me on Instagram. Hope you’ll come back often and I appreciate the feedback so much!
~Deborah xoxo
Happy New Year Deborah-
I have just found your site and I really do love it. I am 67 and they say you can teach a old dog new tricks…so I am working on our 30 year old house here in Colorado and really like your look of your home . Keep up the great work!!!!
I would like to pattern it after your lovely home. I really like anything black and white.
My problem is I have a 2 story home and in the living room /dining room I have 2 cathedral windows with a 1/2 slice above those windows. They are over a window seat that was built in.
My problem is I do not know what to do with that area. Do I paint the side walls over the window seat a color to bring notice to it/ do I just make it neutral/ or do I put window treatments on the area/ I have not done anything to it for 30 years except lace curtains. but this is a new year and I want to start working more on this house….I would like the feeling of calm and have it be inviting and easy.
Do you think you could help me…?
I really do enjoy your website…you have wonderful ideas…and your home is inviting and calm I think….
thank-you for your help Deborah….
best wishes…
Gale.
Hi Gale,
Happy New Year! Sorry for the delay in answering, I’ve been super sick with a yucky virus!
Thank you for your sweet compliments on my home. It’s definitely been a work in progress. If you could email me a photo of the area it would give me a better idea of how to answer your question or if you are on Instagram you can also Direct message me as well.
Thanks and looking forward to giving you a suggestion,
~Deborah
I love the slanted wood hood that you installed over the range. Did you totally remove the exhaust hood or just covered it up while attaching it to the cabinet? The marble contact paper is an awesome temporary idea fix for the real expensive stuff. Great idea! The white cabinets truly brightens everything up. I love window panes and tobacco basket. Awesome Job!
Hi Susan,
We actually left the existing hood range and just built around it. Thanks for all the kind feedback, it’s so appreciated!!
~Deborah xoxo
I love your site! Your house is beautiful😍
Hi Kim,
Thank you so much for the sweet comment. I really appreciate it. I hope you’ll come back often and you will subscribe. I’m launching a whole new look soon with some fun additions!
~Deborah
Gorgeous! Love love love!. Thank you for all you have taught me and mentioned in comment’s to other’s as I had same questions regarding paint color’s etc. Love you’re home and you’re style.
Melissa Lakatos
Hi Melissa,
Thanks so much for the kind feedback. I love hearing that you enjoyed it. Let me know if you ever have any questions. Hope you’ve subscribed as well. I’ll be launching a whole new look soon so stay tuned!
~Deborah
Hi, how is the contact paper holding up next to the stove? I’d love to update my counters, but am afraid of the fire hazard and I can’t seem to find any info on this yet.
Beautiful transformation! I especially like the tiles behind the white dishes. Could you share where you found those?
Hi Deanna,
Thank you! I got them on Amazon. If you go to the “shop” section on my website home page it will take you to the shop my instagram page, look for a kitchen photo and click on it. Then below are links to all the products in the photo. That may help you to find the exact ones easier.
Let me know if that helps you.
Appreciate your feedback,
~Deborah xoxo
Awesome! No words. You always go one step beyond.
There is so much great, useful information here. Thank you! Thank you! Thank you!
Read our guide if you wish.
more @ https://bestfarmhousesink.com/
Thanks again 🙂
Thanks so much for the kind feedback, I really appreciate it
~Deborah
Your post impressed me so much! We’re retired now and can’t afford to be spending a fortune on our house but your post gives me inspiration!
Hi Donna,
Yay I’m so glad to hear it was helpful and inspiring. Nest of luck on your decor …
Thanks for following along
Deborah
Nice update! Where did you get butcher block looking island? Thanks..MC
Thanks. I found it at a local flea market after searching for many years.